
step1. 建立 repo
創建 repo 資料,網路上很多,可以 google 一下,說一下我遇到的問題是我有兩個 github repo,在 mac m1 電腦上推第二個 repo 會一直報 403 錯誤,解法 參考 官網:管理多個帳戶
::: tip 但是!我後來切回原本那個 repo 他又開始 403 報錯了,而且同樣方式再操作也失敗,之後嘗試用 ssh 方式,就沒遇到上述問題,所以建議用 ssh 來推 code 吧! :::
git config --get credential.helper
# 如果輸出為osxkeychain,則您使用的是 macOS 鑰匙串。要清除憑據,請輸入以下命令
#清除憑據
git credential-osxkeychain erase https://github.com
# 將 Git 配置為緩存您克隆存儲庫的每個本地目錄的憑據
git config --global credential.useHttpPath true
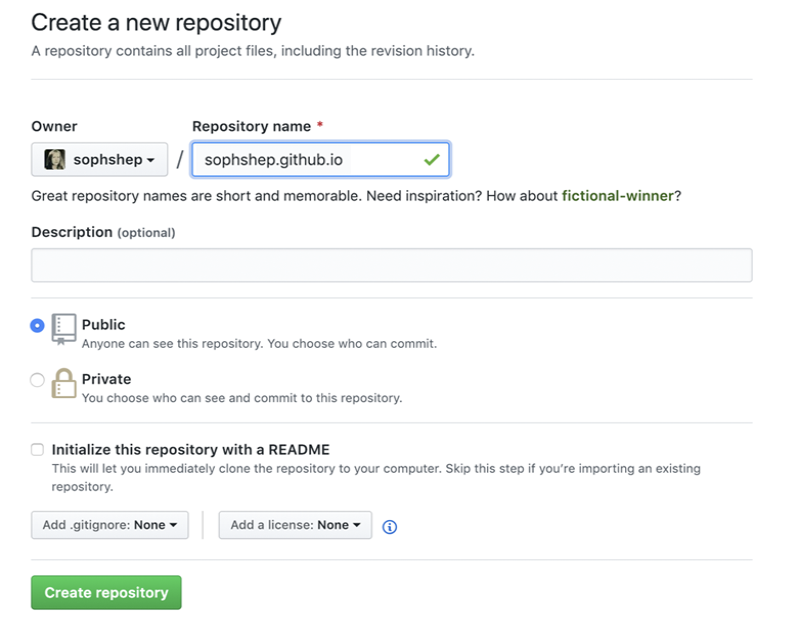
創立 repo 名稱這邊就講比較簡單做法,不加路由的版本,repo 名稱是 username.github.io (把 username 換成你的 git 註冊名字)
step2.在你的 github repo 建立 gh-pages 分枝
這個就在 github 上建立該分枝就好,裡面檔案預設會 copy main 分枝,這沒關係。
step3.地端 yml 檔
# 在git 根目錄
mkdir -p ./github/workflows
複製以下這段到名為 deploy.yml 的檔案,注意的是因為我是用 vite,然後管理包用 yarn,vite build 的資料夾放在 dist 底下,如果你是用一般建立 react 包的方法,會在 build。
name: Deploy to GitHub Pages

on:
  push:
    branches:
      - main
    # Review gh actions docs if you want to further define triggers, paths, etc
    # https://docs.github.com/en/actions/using-workflows/workflow-syntax-for-github-actions#on
permissions:
  contents: write
  pull-requests: write
jobs:
  deploy:
    name: Deploy to GitHub Pages
    runs-on: ubuntu-latest
    steps:
      - uses: actions/checkout@v3
      - uses: actions/setup-node@v3
        with:
          node-version: 18
          cache: yarn

      - name: Install dependencies
        run: yarn install --frozen-lockfile
      - name: Build website
        run: yarn build

      # Popular action to deploy to GitHub Pages:
      # Docs: https://github.com/peaceiris/actions-gh-pages#%EF%B8%8F-docusaurus
      - name: Deploy to GitHub Pages
        uses: peaceiris/actions-gh-pages@v3
        with:
          github_token: ${{ secrets.GITHUB_TOKEN }}
          # Build output to publish to the `gh-pages` branch:
          # 這裡要改成你的build出來的資料夾!!
          publish_dir: ./dist
          # The following lines assign commit authorship to the official
          # GH-Actions bot for deploys to `gh-pages` branch:
          # https://github.com/actions/checkout/issues/13#issuecomment-724415212
          # The GH actions bot is used by default if you didn't specify the two fields.
          # You can swap them out with your own user credentials.
          user_name: github-actions[bot]
          user_email: 41898282+github-actions[bot]@users.noreply.github.com
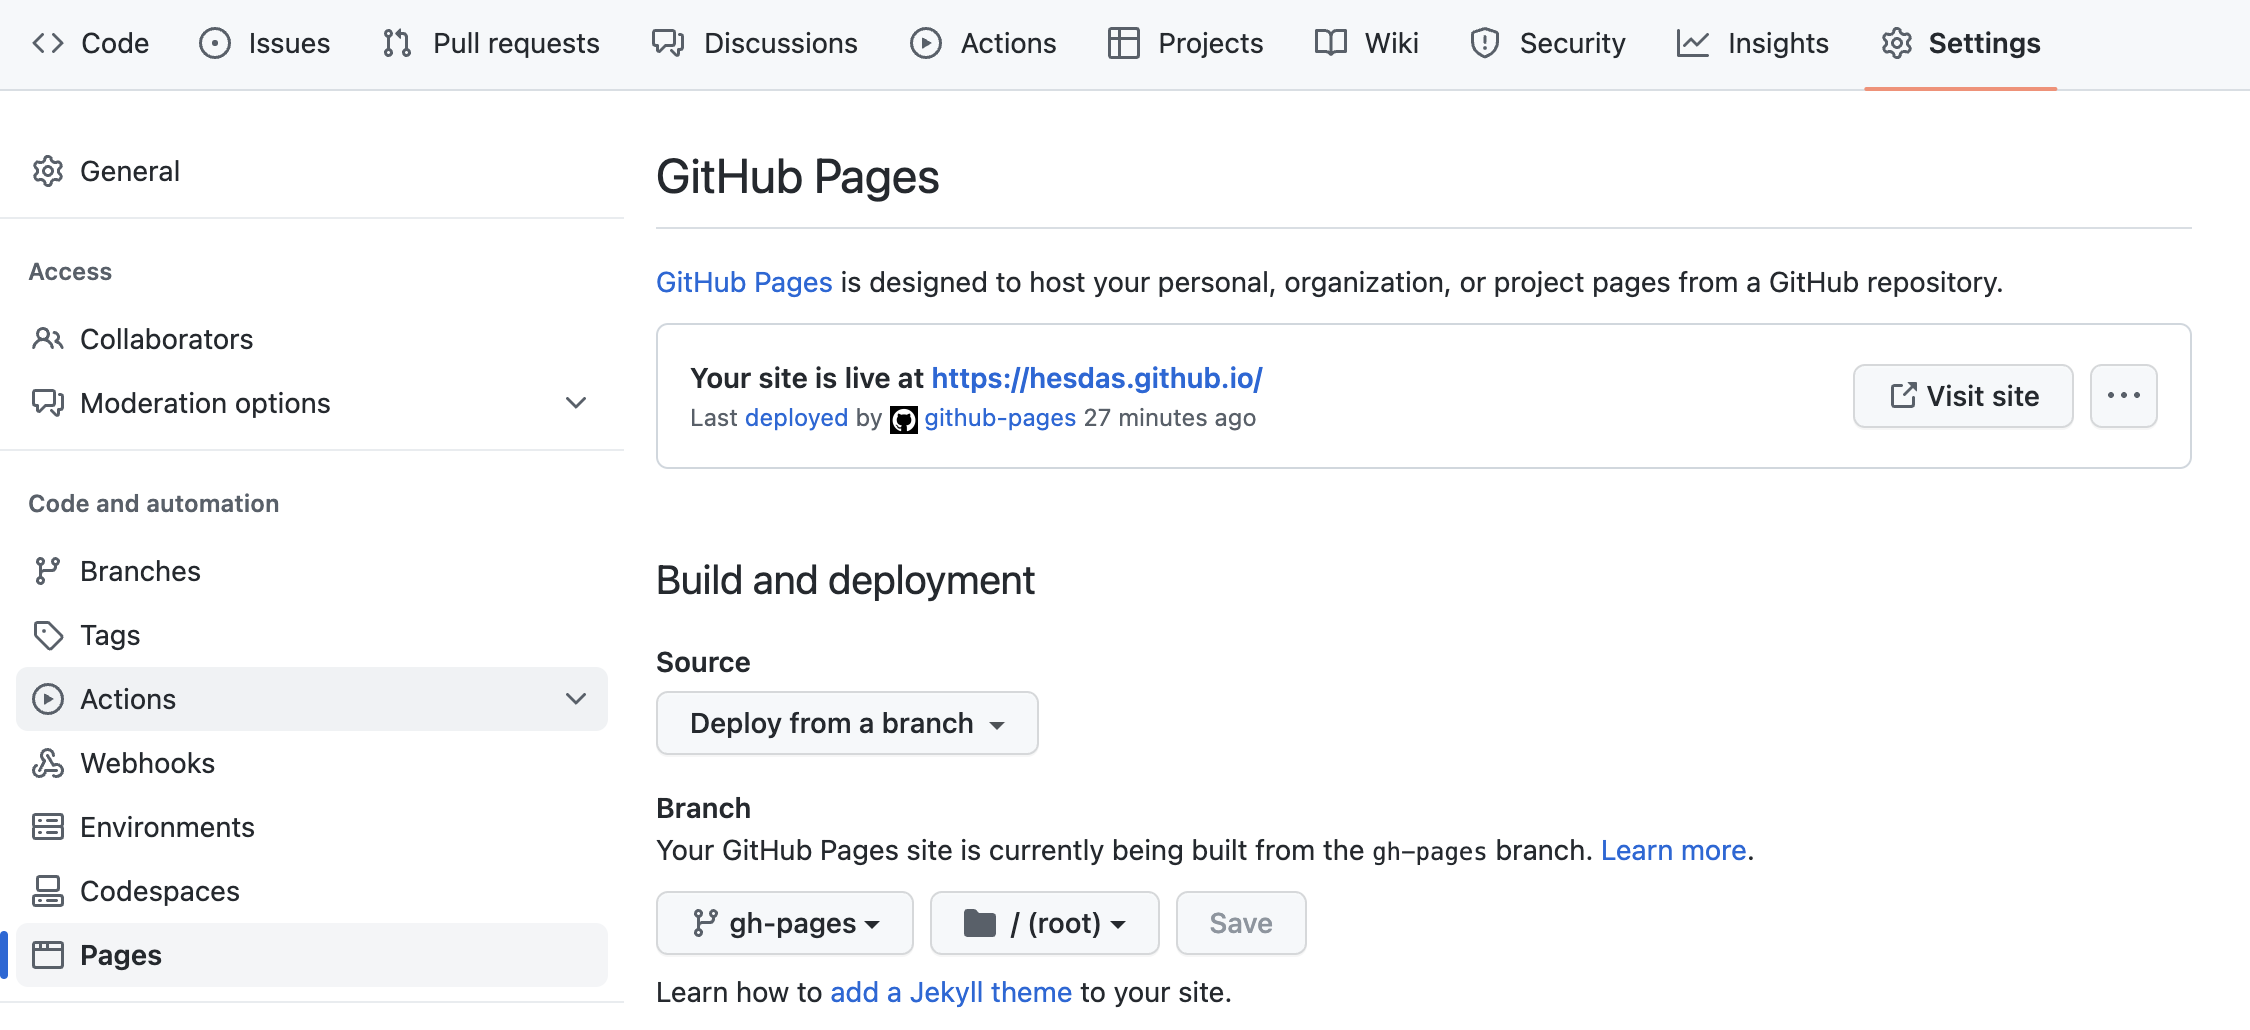
step4.設定預設分枝為 gh-pages
這布很重要,因為我每次設定都忘記要設定這個! 忘記的話,最後連線到網站都會 F12 報錯 Failed to load module script: Expected a JavaScript module script but the server responded with a MIME type of "text/jsx". Strict MIME type checking is enforced for module scripts per HTML spec.
!!!很重要!!! 不然網站會是白的QAQ
step5. 推檔案到 github main branch
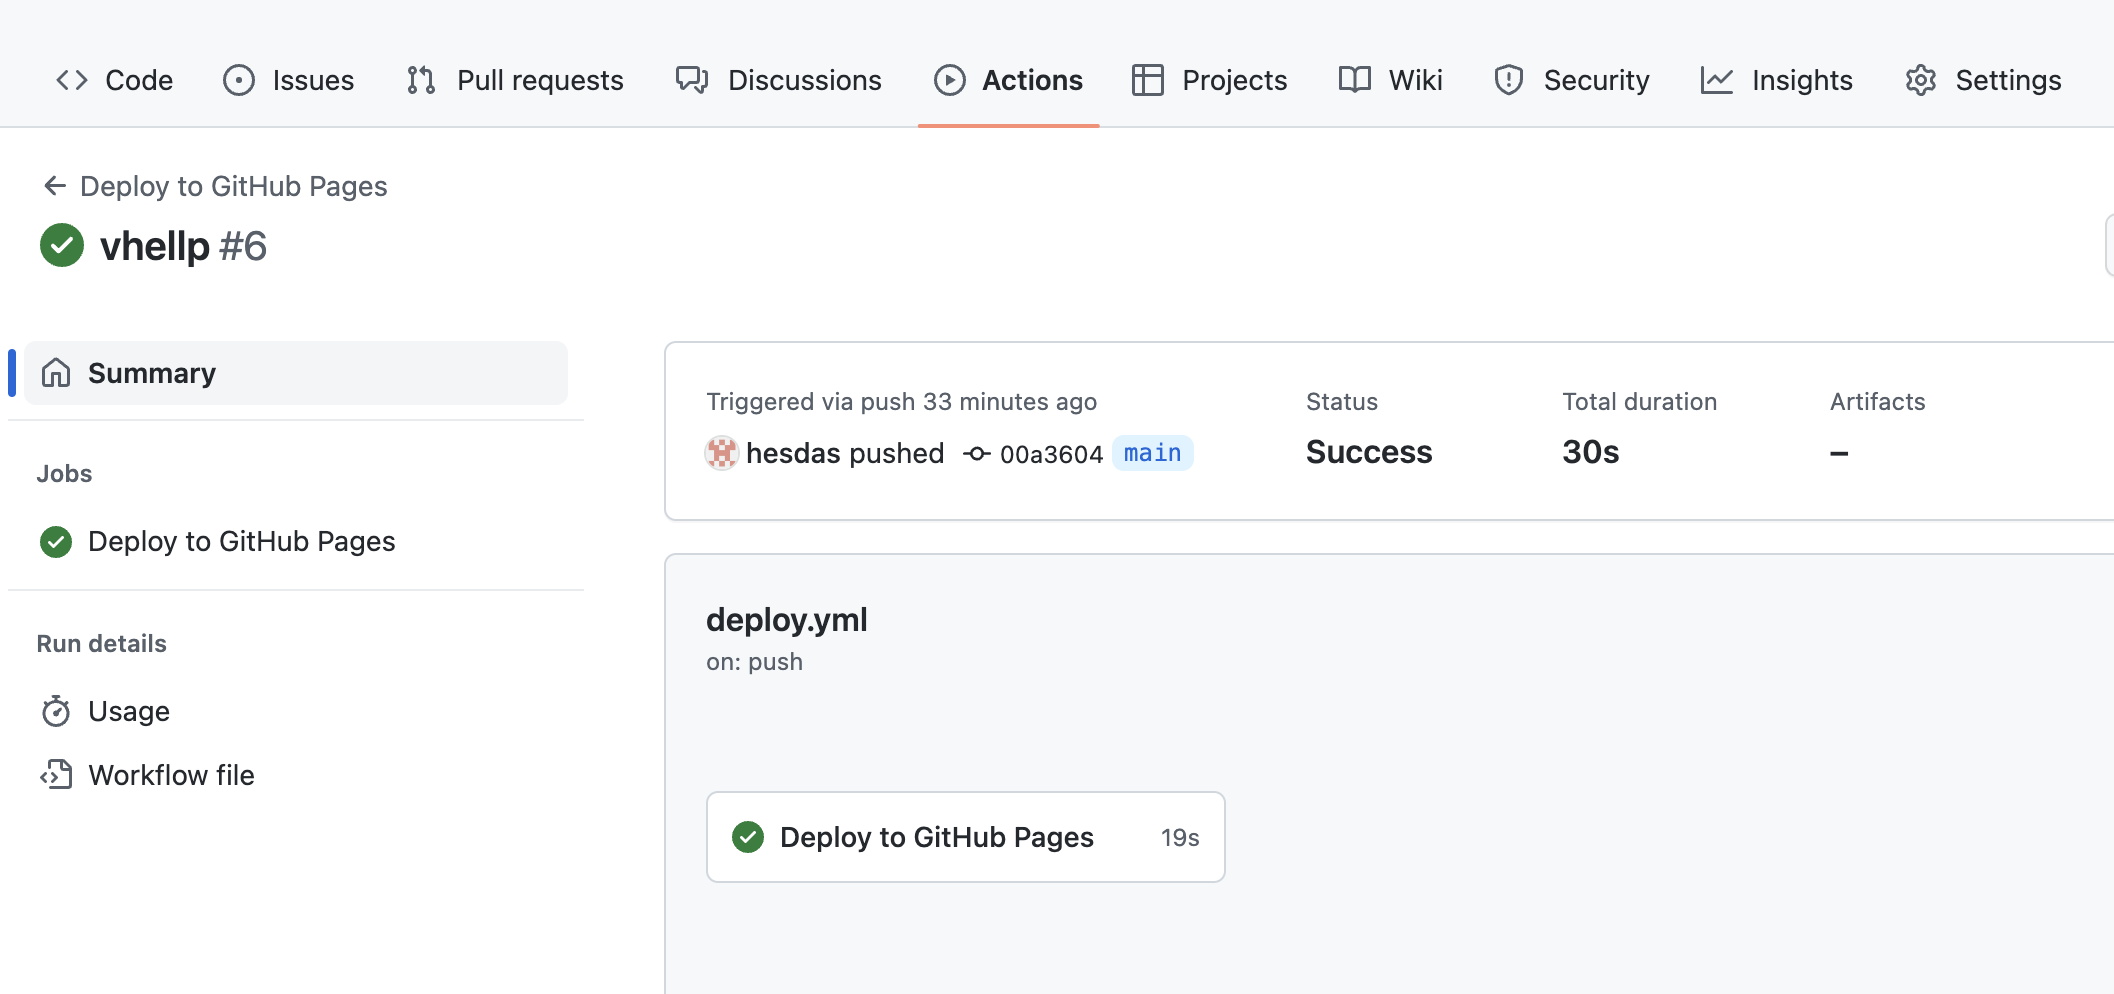
就 git push ,然後你可以到 action 那邊確認是否 CI 成功,成功的話請到 gh-pages 確認資料夾結構是你 build 完資料夾的長相,當然,地端請確認 build 完資料,是可以成功提供服務的!
成功畫面要長這樣
DONE
請連線 https://yourusername.github.io/ 做確認